Introduction to dmtools
This tutorial will walk through a short introduction to dmtools. The tutorial is divided into sections which each focus on a certain module of dmtools. Note that this documentation is under development.
io (input / output)
The first step in manuipulating images programtically with dmtools is loading
in an image. This is done using dmtools.io.read_png(). Similarly,
after manuipulating the image, you can export it to a PNG file with
dmtools.io.write_png(). Here is a short example script with no
manipulations. Note that this example script assumes that the script
io_ex.py and checks_10.png are in the same directory.
# io_ex.py
import dmtools

image = dmtools.read_png('checks_10.png')
dmtools.write_png(image, 'checks_10_clone.png')

checks_10.png |

checks_10_clone.png |
transform
The transform module contains many functions for manipulating images. The full
API reference can be found here: dmtools.transform. In this section,
we will highlight some of the functionality.
Currently, the transform module is mainly focused on image manipulations
related to rescaling an image. Frequently, the first step in image rescaling is
blurring the image. This provides a good removal of “noise” from the image.
The dmtools.transform.blur() functions does just that. It takes a
parameter called sigma which indicates how much to blur the image.
Usually, sigma=0.5 is a good default. The example script below reads
red_blue_square.png and then blurs the image with two different values of
sigma. You can see the resulting images below where the larger sigma
results in a blurrier image.
# simple_blur.py
import dmtools
from dmtools import transform

image = dmtools.read_png('red_blue_square.png')
blurred_image = transform.blur(image, sigma=5)
dmtools.write_png(blurred_image, 'red_blue_square_blur_5.png')

blurred_image = transform.blur(image, sigma=10)
dmtools.write_png(blurred_image, 'red_blue_square_blur_10.png')

red_blue_square.png |

red_blue_square_blur_5.png |

red_blue_square_blur_10.png |
After blurring, we can actually rescale the image. This step is also called
“resampling.” This is done with dmtools.transform.rescale(). This
takes a parameter k which specifies by what factor to scale the image.
Hence, k=2 would double the width and height of the image.
When scaling down an image, we have more than one source pixel for each new pixel and we must decide how to assign a color to that new pixel. Similarly, when scaling up an image, we have many pixels in the new image for which there are no corresponding source pixels. Again, we must decide how to assign these pixels a color based on their proximity to the source pixels. A filter is a combination of a weighting function and support which determine how we choose.
In the dmtools rescale implementation, there are multiple built-in filters.
A comprehensive list of them is given in the documentation:
dmtools.transform.rescale(). Depending on the use case, one or more of
the filters may be applicable. The exciting feature of this implementation is
the ability to provide one’s own weighting function and support to define
custom filters. The weighting function (blue) and supports (red) of some common
filters are given below. The weighting function tells us how much to weight the
color of a source pixel as a function of its distance to the new pixel. The
support defines the “neighborhood” of pixels. In most cases, that is the
furthest a source pixel can be while still contributing some weight.
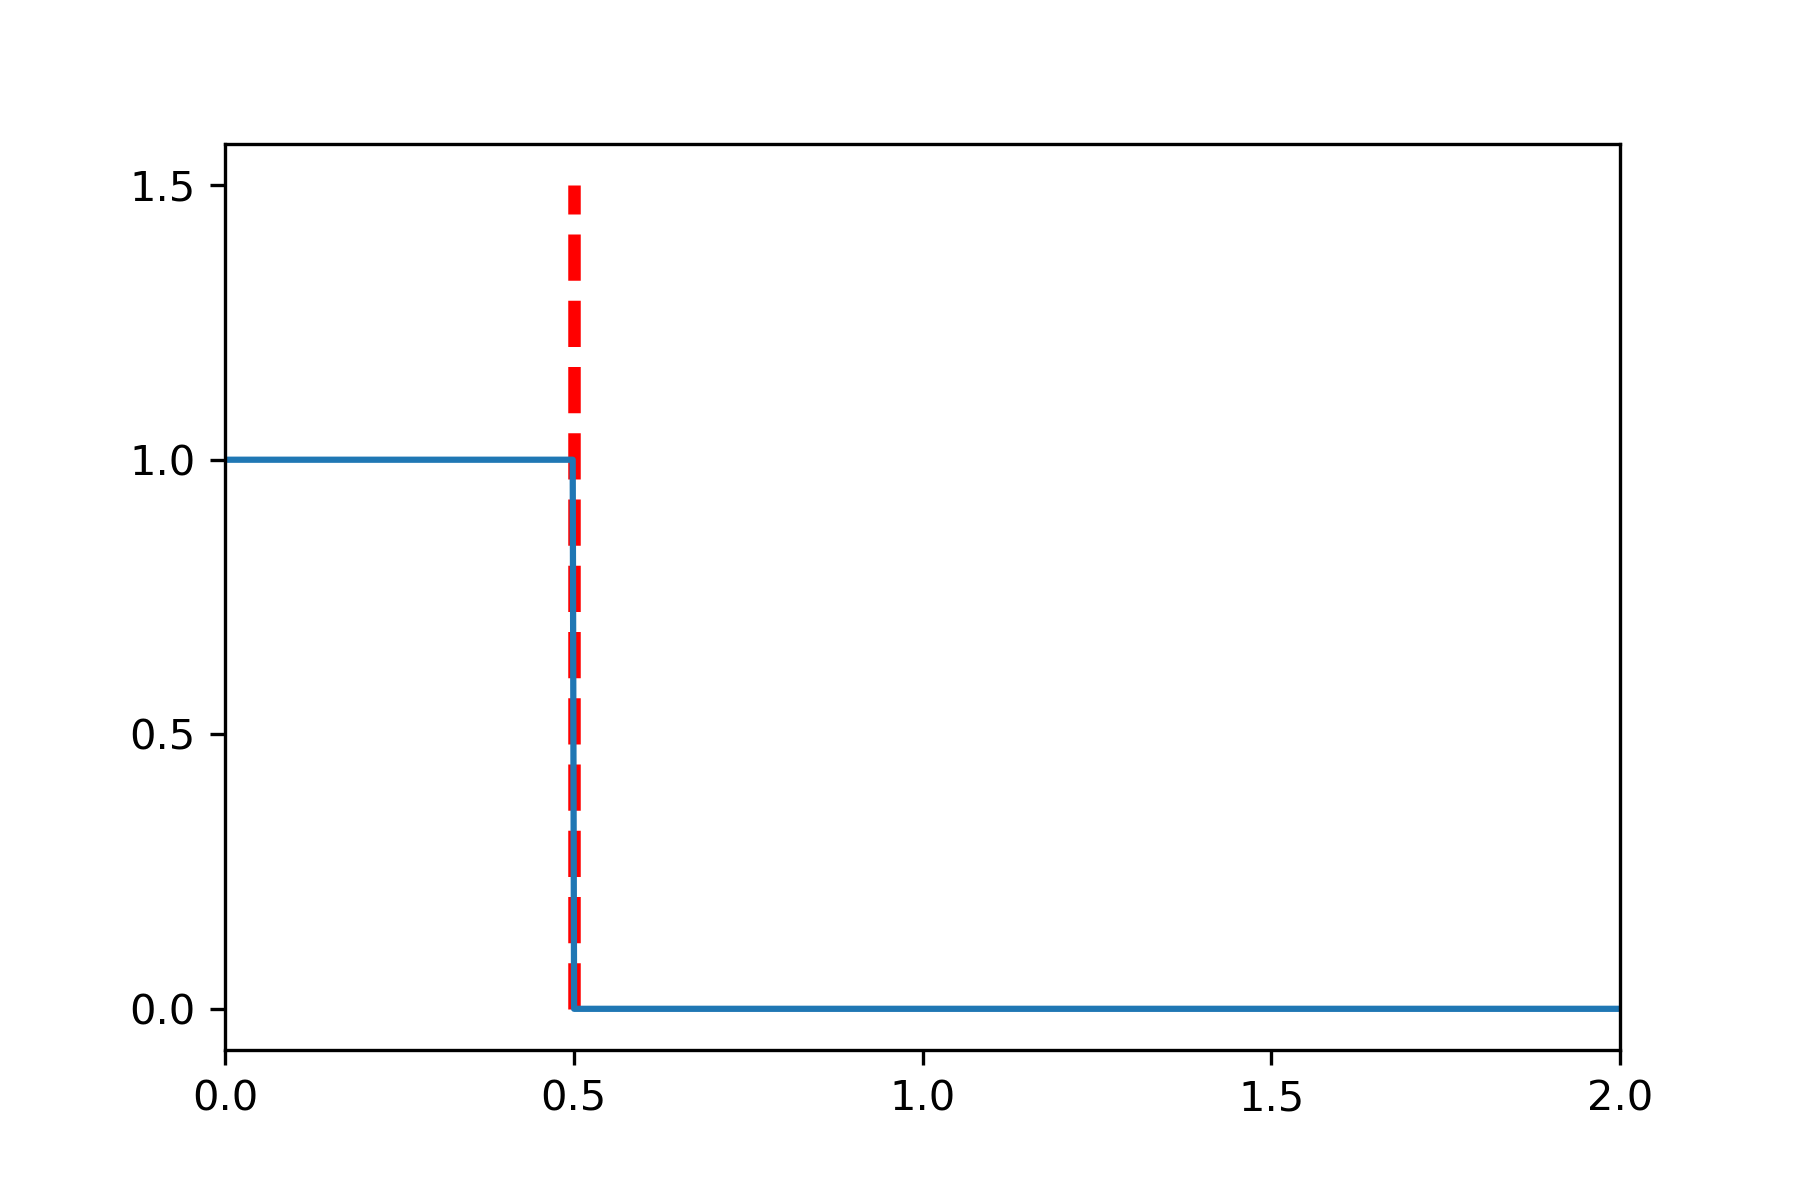
Box Filter |
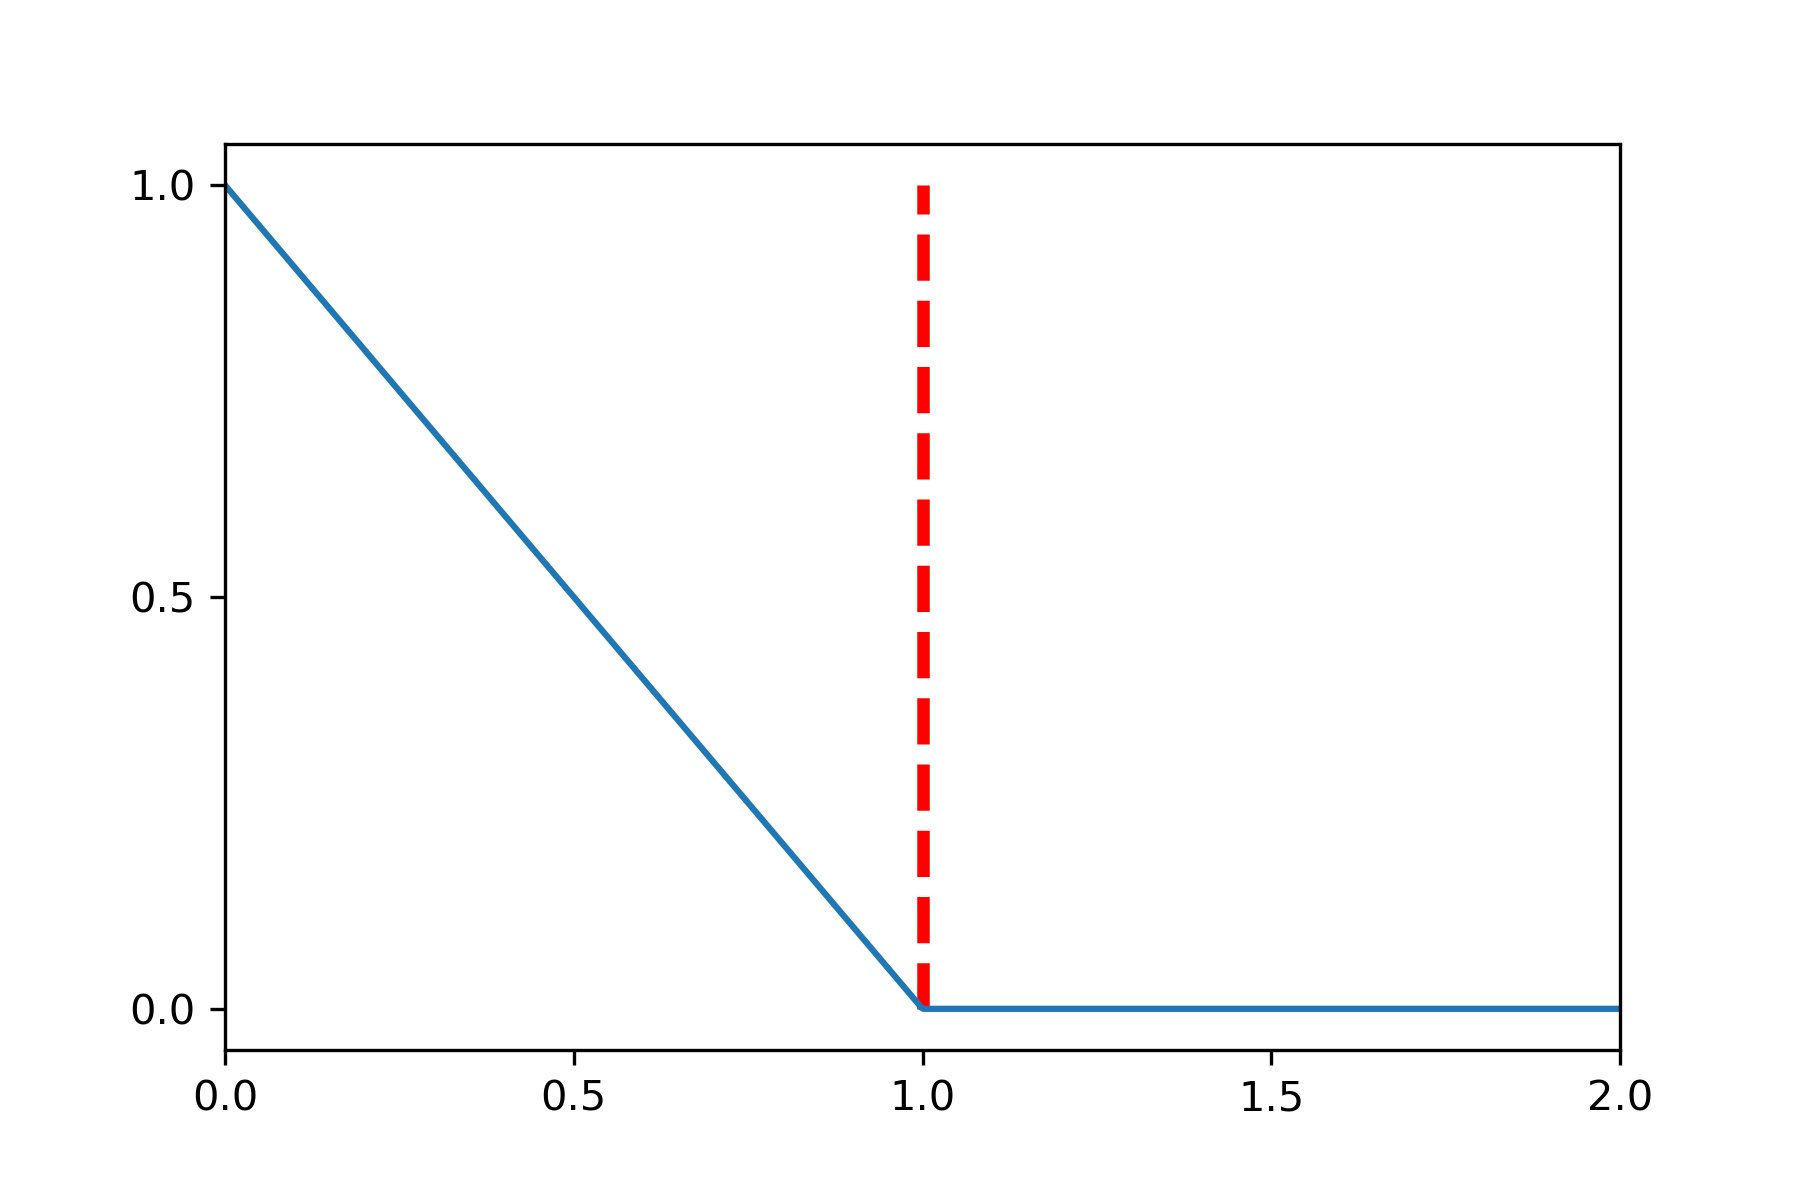
Triangle Filter |
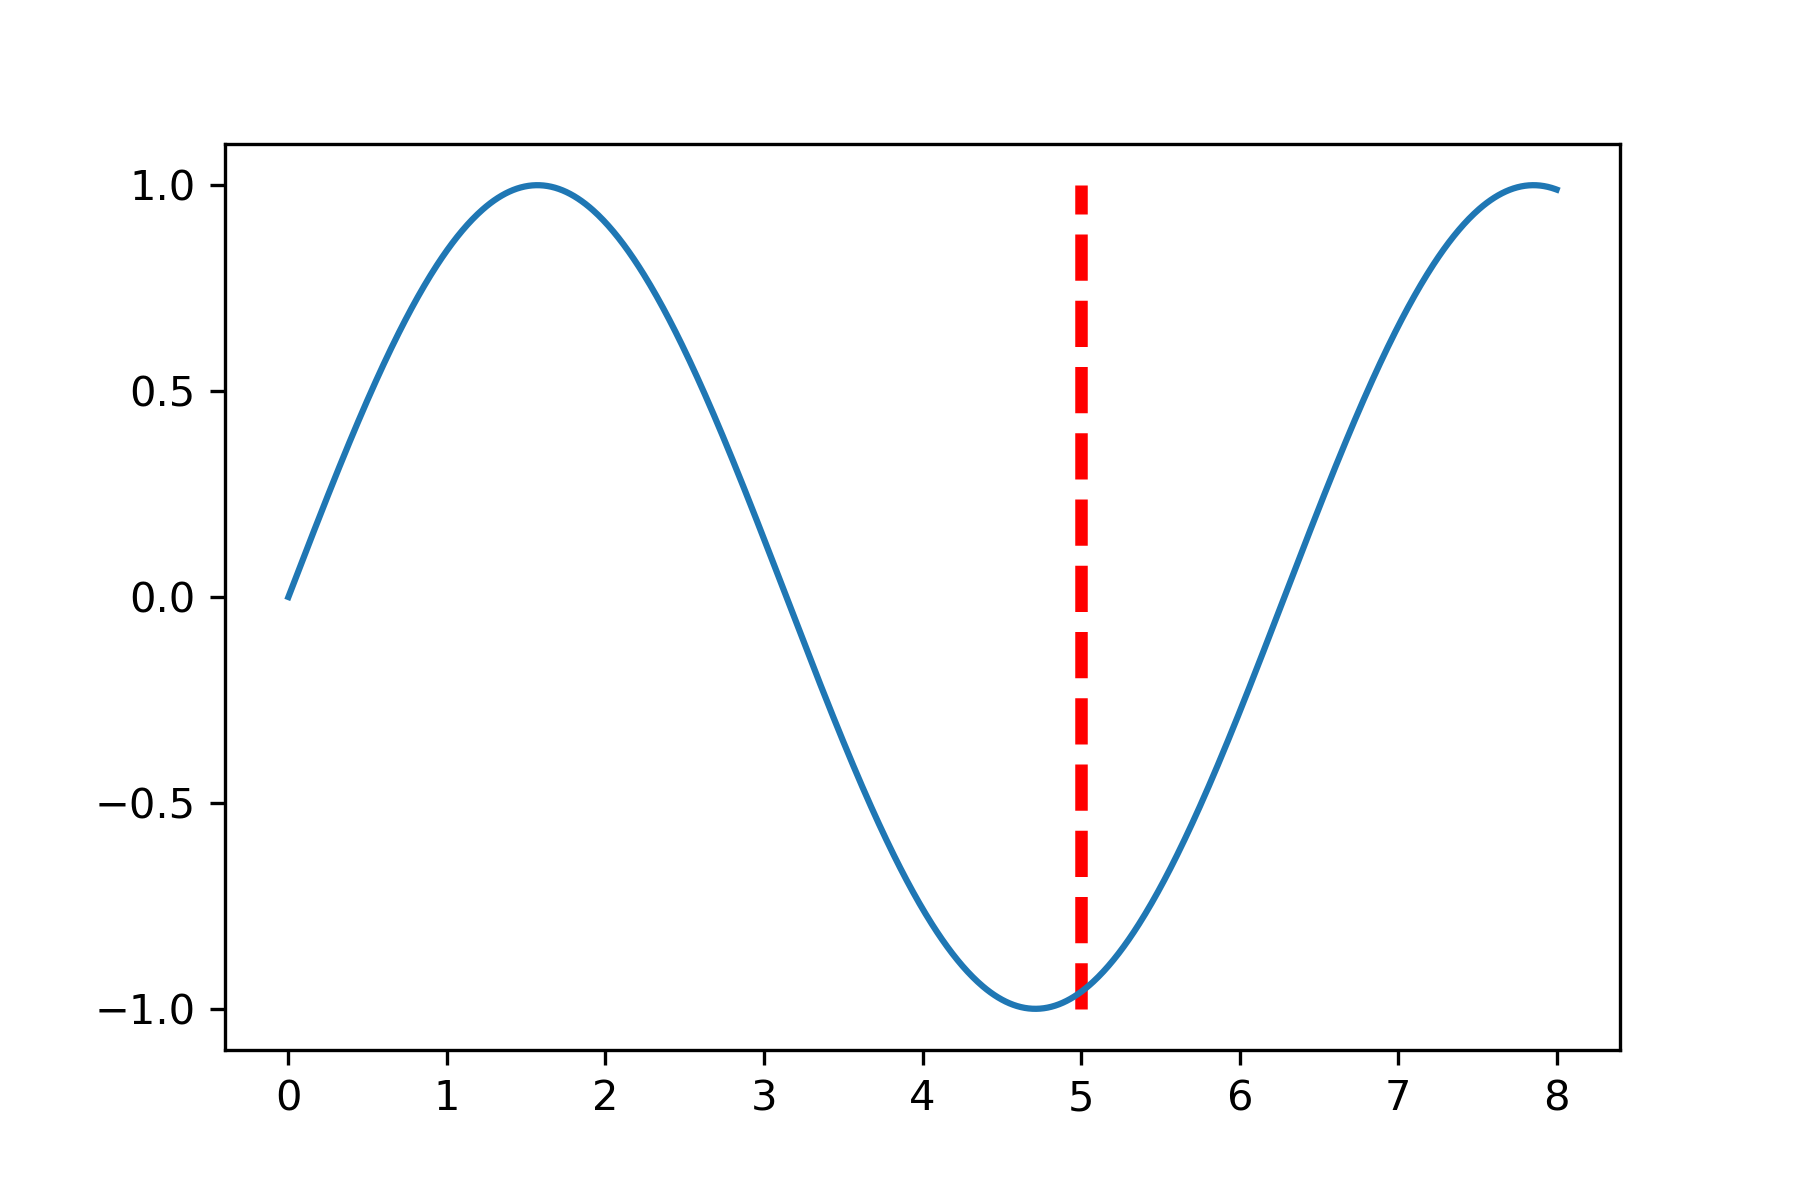
Custom Filter |
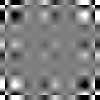
In the example script below, we load the 10x10 checkerboard image and scale it
up using three different filters: “point” or “nearest neighbor”, “triangle”,
and a custom filter. You can ignore transform.clip and
transform.normalize for now. The resulting images are also shown.
# rescale_ex.py
import dmtools
from dmtools import transform
import numpy as np

image = dmtools.read_png('checks_10.png')
scaled_image = transform.rescale(image, k=10, filter='point')
scaled_image = transform.clip(scaled_image).astype(np.uint8)
dmtools.write_png(scaled_image, 'checks_10_point.png')

scaled_image = transform.rescale(image, k=10, filter='triangle')
scaled_image = transform.clip(scaled_image).astype(np.uint8)
dmtools.write_png(scaled_image, 'checks_10_triangle.png')

def f(x):
    return np.sin(x)

# use a custom weighting function and support
scaled_image = transform.rescale(image, k=10, weighting_function=f, support=5)
scaled_image = transform.normalize(scaled_image).astype(np.uint8)
dmtools.write_png(scaled_image, 'checks_10_custom.png')

checks_10_point.png |

checks_10_triangle.png |

checks_10_custom.png |
You can see how “point” is the best filter for maintaining the pixels of the original image. Here, the “triangle” filter causes the image to be blurred since it is takes the average of surrounding white and black pixels causing the gray space between them. Any reasonable filter will mostly decrease the weight as the distance gets further. Furthermore, they will not have significant negative weights. For that reason, the custom filter used here does all sorts of strange things to the image.
After rescaling the image, we would like to write it to a PNG file. However,
the rescaling step results in pixels having non-integer values which can also
be outside of the [0, 255] range (especially when using strange filters). The
transform module provides three different functions to adjust values back into
the [0, 255] range: dmtools.transform.clip(),
dmtools.transform.normalize(), dmtools.transform.wraparound().
It is recommended to use .astype(np.uint8) to round. The example script
below shows how the choice of which of these you use affects the resulting image.
# clamping_ex.py
import dmtools
from dmtools import transform
import numpy as np

def f(x):
    return np.sin(x)

image = dmtools.read_png('checks_10.png')
scaled_image = transform.rescale(image, k=10, weighting_function=f, support=7)

clip_image = transform.clip(scaled_image).astype(np.uint8)
dmtools.write_png(clip_image, 'checks_10_clip.png')

normalize_image = transform.normalize(scaled_image).astype(np.uint8)
dmtools.write_png(normalize_image, 'checks_10_normalize.png')

wraparound_image = transform.wraparound(scaled_image).astype(np.uint8)
dmtools.write_png(wraparound_image, 'checks_10_wraparound.png')
checks_10_clip.png |
checks_10_normalize.png |

checks_10_wraparound.png |
In checks_10_wraparound.png, we can see harsh contrast between gradients
where a gradient progressively gets darker until it switches white. This is
arising from dark values above 255 (black) wrapping around to 0 (white) and
vice versa. In checks_10_clip.png, these are the darkest and whitest areas
in the image since values above or below just get clipped to 0 and 255
respectively. Lastly, checks_10_normalize.png normalizes the minimum and
largest value to 0 and 255 causing this image to loose contrast in the center
when compared to the clipping algorithm.